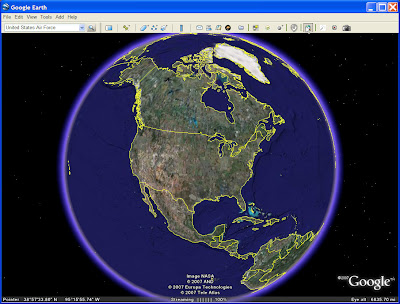
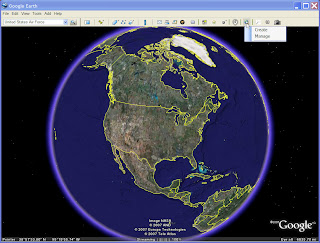
To begin with, you will need to download Microsoft's Visual Studion Express Edition for C# (available for free at http://www.microsoft.com/express/vcsharp/).
Once Visual Studio is installed, select 'New Project' from the 'File' menu. In the New Project dialog box, select 'Windows Forms Application' and name your application 'FirstGeApp' (see below). Then select OK.

Once the new form is visible, right click on it and select 'Properties'. A properties window should appear in the lower right hand corner of Visual Studio. Change the following Form properties:
Name = frmViewCapture
Text = View Capture
TopMost = True
The TopMost property will keep your form on top of all other applications. This works well when interacting with Google Earth.

Once you have set the Form properties, we will add a MenuStrip control to the form, to do this, click on the Toolbox on the left side of the Visual Studio. When the tools appear, click on the pushpin icon to keep the tools open (see above).
After this, look for the 'MenuStrip' control and drag it onto your form.
Once the MenuStrip is on your Form, click on it to enter text. In the example below, I have added a 'File' menu and a "Capture View" menu. You can keep the default setting for both of these.
Next, we are going to add a TreeView control to store our captured views. Find TreeView from the Toobox pallete and drag it onto the form. Once you have done so, change the 'Dock' property of the TreeView to "Fill" (see bel0w). This will make the TreeView take up our whole Form.
Next, add an ImageList control. You can drag this control onto the Form, or drag it to the bottom part of Visual Studio (see below).
After you have added the ImageList, right click on and select 'Choose images' (see above). In the next dialog box, select "Add". Navigate to an icon of your choice (I used
C:\Program Files\Google\Google Earth\GoogleEarth.ico).
Once you have added the image, click on the TreeView in the form and look in the Properties on the right. Set the following properties:
ImageList = imageList1
ImageIndex = 0
Next, you will need to add a reference to Google Earth. To do so, look for 'References' in the Solution Explorer in the upper right hand panel of Visual Studio. Right click References and select "Add Reference". In the dialog box that comes up, select the 'Browse' tab. Browse to
C:\Program Files\Google\Google Earth\googleearth.dll (depending on your installation) and add it as a reference.
Next, click on Form1 in the Solution Explorer and select Code View (see below).

Now we are going to add some code. You will see code similar to below. Add the underlined code to project.
using System;
using System.Collections.Generic;
using System.ComponentModel;
using System.Data;
using System.Drawing;
using System.Linq;
using System.Text;
using System.Windows.Forms;
namespace FirstGeApp
{
public partial class frmViewCapture : Form
{
//Add a reference to the Google Earth Library
private EARTHLib.ApplicationGEClass _ge = new EARTHLib.ApplicationGEClass();
//Make an integer to keep track of our Google Earth Views
private int _viewNum = 0;
public frmViewCapture()
{
InitializeComponent();
}
}
}
Next, we will nee an event handler to capture the view. The simplest way to do this is to go back to your form and double-click "Capture View" on the menu that you added to your form. Visual Studio will automatically add the code below to handle the click event for this menu item.
private void captureViewToolStripMenuItem_Click(object sender, EventArgs e)
{
}
Next, we will add some code to actually handle this event. Write the following method underneath the captureViewToolStripMenuItem_Click method.
private void captureGeView()
{
//Get the current Google Earth Camera
EARTHLib.CameraInfoGE cam = _ge.GetCamera(1);
//Increment the number of views
_viewNum++;
//Create a Node for the tree view
TreeNode node = new TreeNode("View " + _viewNum.ToString());
//Add a reference the the GE Camera to the node
node.Tag = cam;
//Add the node to the tree view
this.treeView1.Nodes.Add(node);
}
Now, add "captureGeView();" to the captureViewToolStripMenuItem_Click method.
The next step is to add code to actually move Google Earth to each of the capture views. Go back to the Form and click on the TreeView control (treeView1). On top of the properties box, you will see an icon that looks like a bolt of lightening. Select this to see events for the TreeView. Double Click on MouseDown to automatically add a handler (see below).

This will add a "treeView1MouseDown" method to your code. Add the following code in this method.
private void treeView1_MouseDown(object sender, MouseEventArgs e)
{
//Get the clicked node
TreeNode node = this.treeView1.GetNodeAt(new Point(e.X, e.Y));
if (node != null)
{
//Get the cam from the tree view tag reference
EARTHLib.CameraInfoGE camera = (EARTHLib.CameraInfoGE)node.Tag;
//Move the GE View
moveGE(camera);
}
}
And the following
private void moveGE(EARTHLib.CameraInfoGE cam)
{
//Set the Google Earth Camera View
_ge.SetCamera(cam, .5); //Change this number to alter your speed
}
Now Press F5 on your keyboard to run. Google Earth will open with your application. Clicking "Capture View" will add a view to your Tree View. Clicking on a node on your TreeView will move you to that node
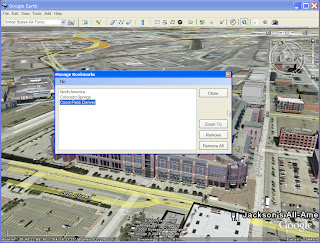
 Can you name this stadium?
You can take this much farther by adding user input to name each view and alter the speed. Chain them together to creat a tour or export to KML.


